
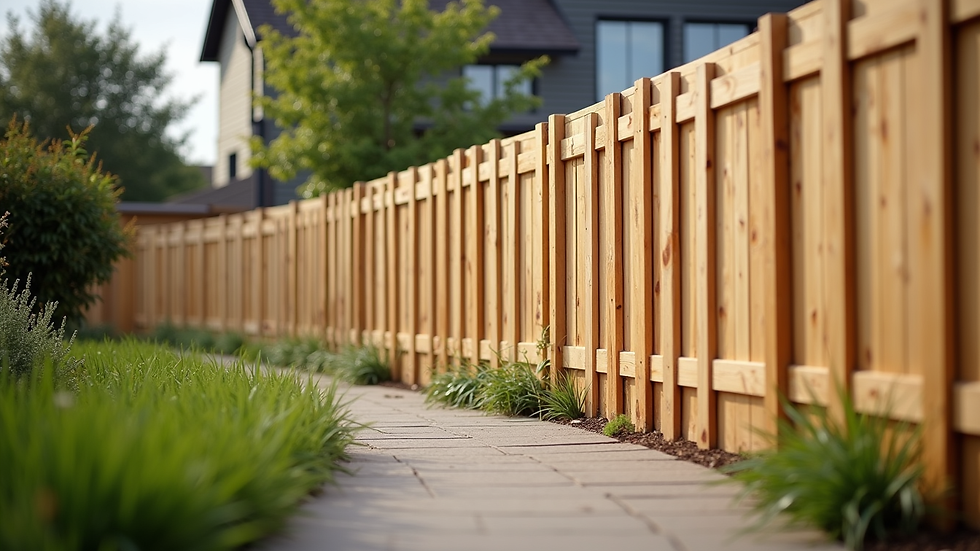
Step-by-Step Wooden Fence Installation
- TF Home and Fence

- Oct 20, 2025
- 4 min read
Installing a wooden fence can enhance your property’s privacy, security, and curb appeal. Whether you want to keep pets safe, define your garden space, or add a decorative touch, a wooden fence is a versatile choice. This guide will walk you through the entire process of wooden fence installation, from planning to finishing touches. By following these steps, you can achieve a professional-looking fence that lasts for years.
Planning Your Wooden Fence Installation
Before you start digging post holes or buying materials, proper planning is essential. Begin by determining the purpose of your fence. Are you looking for privacy, security, or simply a boundary marker? This will influence the type of wood, height, and style you choose.
Next, check local regulations and obtain any necessary permits. Many municipalities have rules about fence height, location, and materials. Contact your local building department or visit their website to ensure compliance.
Measure the perimeter where you want the fence installed. Use a tape measure and mark the corners with stakes. This will help you calculate how much material you need. Also, call your utility company to mark underground lines before digging.
Choose the type of wood that suits your climate and budget. Cedar and redwood are popular for their natural resistance to rot and insects. Pine is more affordable but requires treatment to last longer.
Finally, gather your tools and materials. You will need:
Wooden posts and panels or pickets
Concrete mix
Gravel
Nails or screws
A post hole digger or auger
A level
A hammer or drill
Measuring tape
String and stakes
A saw
Proper planning saves time and money and ensures your fence will be sturdy and attractive.

Wooden Fence Installation: Step-by-Step Guide
Once you have your plan and materials ready, it’s time to start the installation. Follow these steps carefully for the best results.
Step 1: Mark and Dig Post Holes
Use string and stakes to outline the fence line. Mark the location of each post hole, typically spaced 6 to 8 feet apart depending on your fence design. Use a post hole digger or auger to dig holes about 2 feet deep and 10 to 12 inches wide. Add 6 inches of gravel at the bottom of each hole for drainage.
Step 2: Set the Posts
Place a wooden post in each hole. Use a level to ensure the post is vertical. Pour concrete mix around the post, filling the hole to ground level. Slope the concrete away from the post to prevent water pooling. Allow the concrete to cure for at least 24 to 48 hours before attaching fence panels or pickets.
Step 3: Attach Fence Panels or Pickets
If you are using pre-made panels, attach them to the posts with screws or nails. For individual pickets, nail or screw each picket to horizontal rails attached to the posts. Space pickets evenly, usually about 1/2 inch apart for privacy fences or wider for decorative fences.
Step 4: Add Gates and Finishing Touches
Install gates where needed, ensuring they swing freely and latch securely. Sand any rough edges and apply a wood preservative or stain to protect your fence from weather damage. Regular maintenance will extend the life of your fence.

How much is an average fencing job?
The cost of a wooden fence installation varies based on several factors including the type of wood, fence height, length, and labor costs. On average, expect to pay between $15 and $30 per linear foot for materials and installation.
For example:
Basic pine picket fence: $15 to $20 per linear foot
Cedar or redwood privacy fence: $25 to $30 per linear foot
Custom designs or gates: Additional costs apply
Labor costs can vary by region and complexity of the job. DIY installation can save money but requires time and effort.
To get an accurate estimate, consider contacting local professionals. Searching for wood fence installation near me can connect you with experienced contractors who provide free quotes and advice.
Tips for Maintaining Your Wooden Fence
A wooden fence requires regular care to stay beautiful and functional. Here are some practical tips:
Inspect annually: Check for loose nails, damaged boards, or signs of rot.
Clean regularly: Use a power washer or scrub brush to remove dirt and mildew.
Apply sealant or stain: Every 2-3 years, apply a protective finish to prevent moisture damage.
Trim vegetation: Keep plants and grass away from the fence to reduce moisture buildup.
Repair promptly: Fix any damage quickly to prevent it from worsening.
Proper maintenance can extend your fence’s life by many years and keep it looking fresh.

Enhancing Your Property with a Wooden Fence
A well-installed wooden fence does more than mark boundaries. It adds character and value to your home. Consider these enhancements:
Decorative tops: Add lattice or scalloped edges for a unique look.
Lighting: Install solar or low-voltage lights on posts for safety and ambiance.
Planters: Attach flower boxes or climbing plants to soften the fence’s appearance.
Color: Choose stains or paints that complement your home’s exterior.
By customizing your fence, you create a welcoming outdoor space that reflects your style.
Installing a wooden fence is a rewarding project that improves your property’s function and beauty. With careful planning, the right materials, and proper installation techniques, you can enjoy a durable fence for years to come. If you prefer professional help, searching for wood fence installation near me is a great way to find trusted experts in your area.


Comments